

Click here to download the latest version of the Nolvus Dashboard Installer application.
When donwloaded, don't directly run the NolvusUpdater.exe from your Windows download location. Create a new folder anywhere except in your
It's highly recommended to not install Nolvus in your Steam folders or in Program Files folder to avoid any issues.
DO NOT MOVE YOUR DASHBOARD TO AN OTHER DRIVE/DIRECTORY DURING INSTALLATION, YOU WILL BREAK EVERYTHING!!!
YOU ARE WARNED
Go to the location where you have copied the file and execute NolvusUpdater.exe
Let the installer proceed to installation
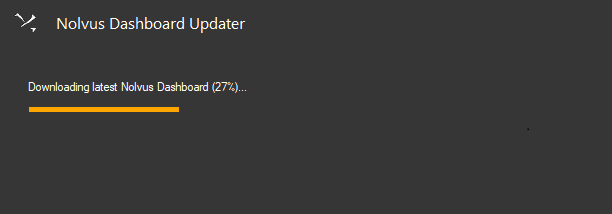
When finished, close the window
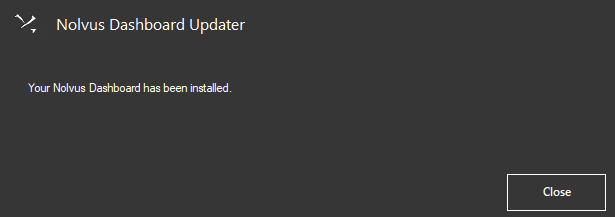
Select your Skyrim Special Edition directory.
Click on Auto detect or browse your Skyrim Special Edition directory manually, then click on Next
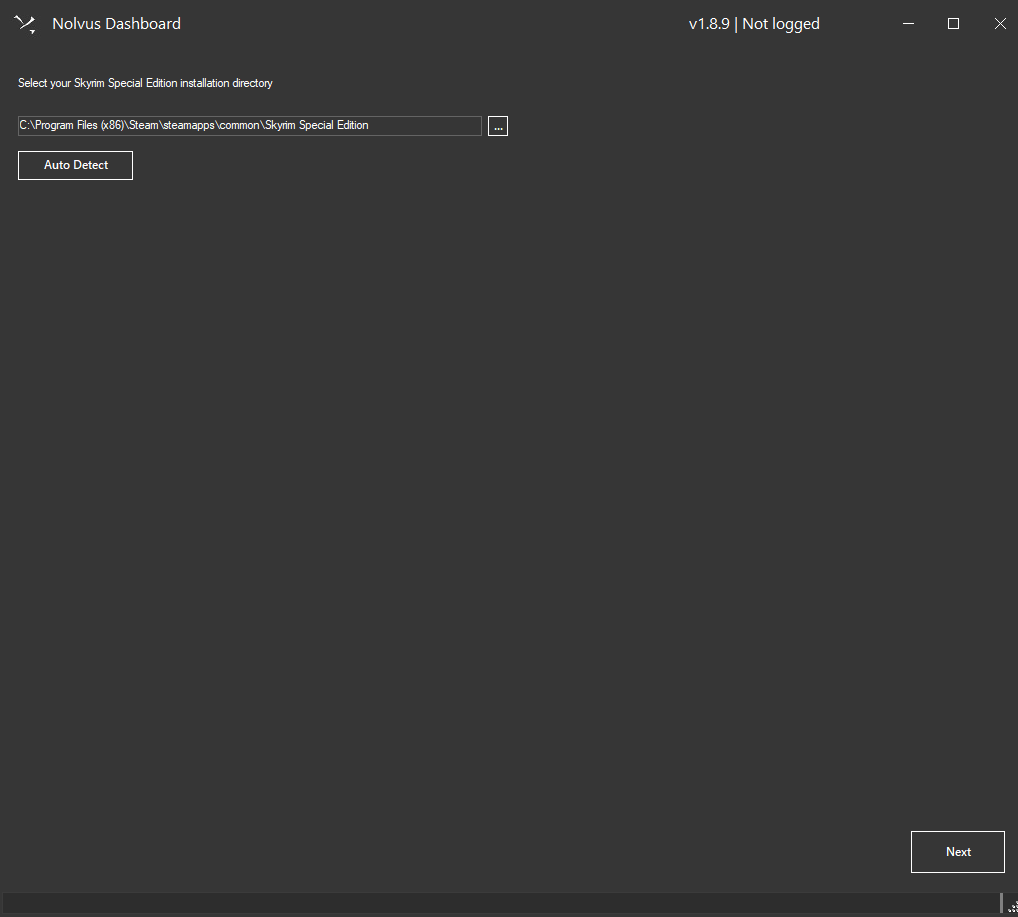
Click on the Nexus SSO Authentication button

If you need to login to nexus, please provide your nexus credentials then click on the Authorise button

The Nolvus Dashboard is a nexus approved application. You can find the source code here
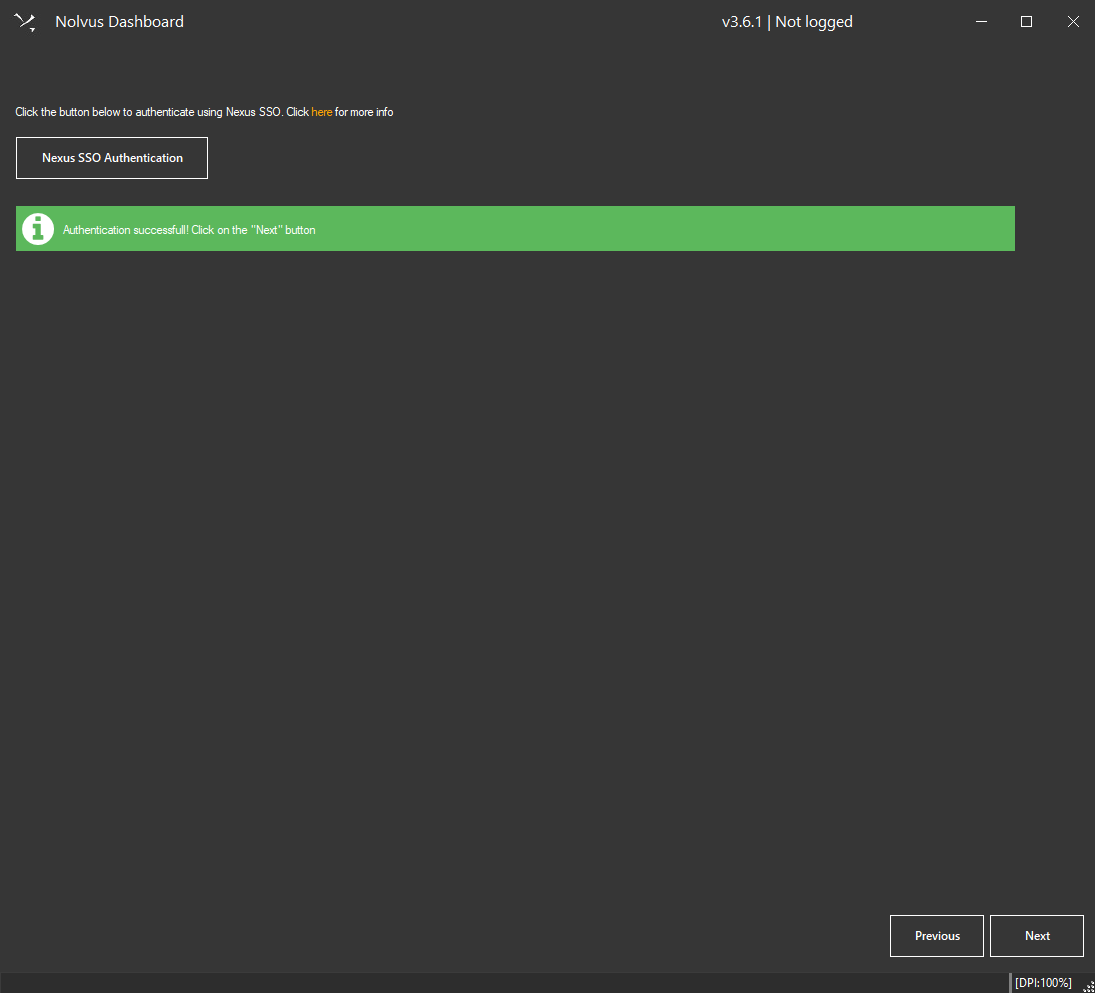
Click on next.
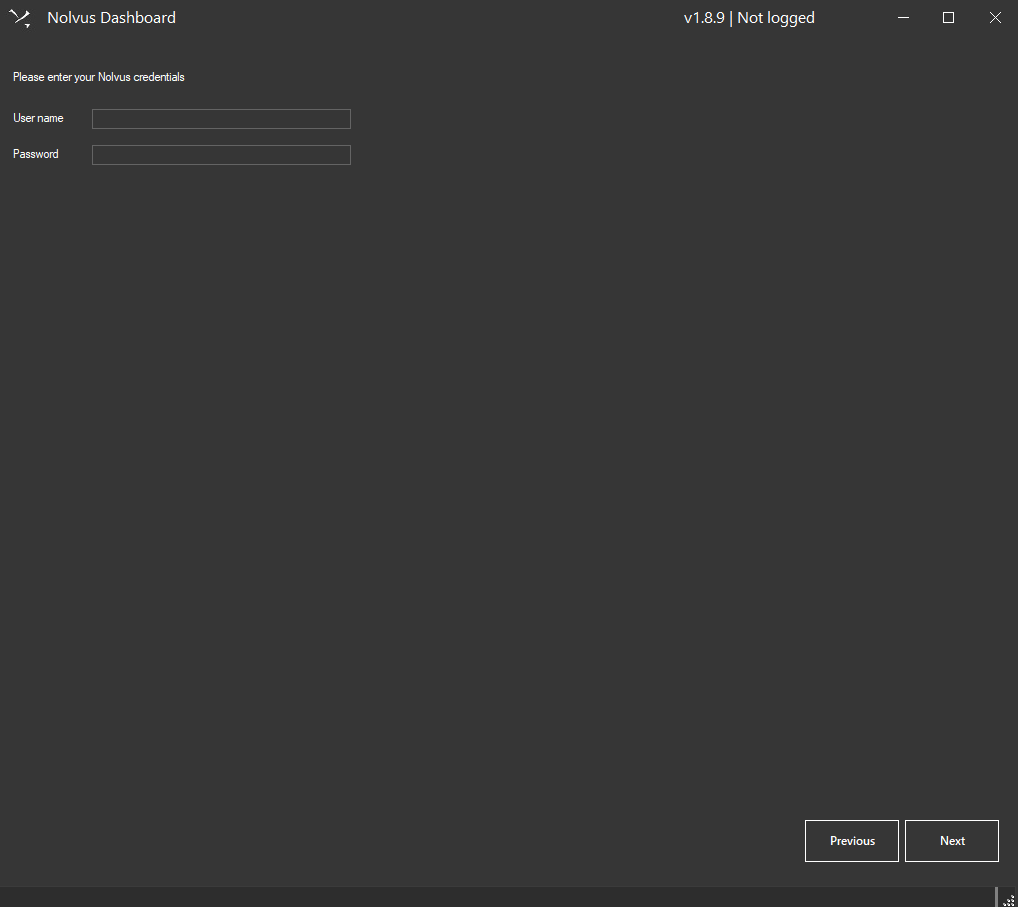
Enter your Nolvus account user name and password and click on Next.
Warning!!! A common mistake is to enter your Nexus credentials instead of the Nolvus ones. Be sure your entered your Nolvus credentials.
To launch the auto installer
This is the first installation screen you get.

Nolvus latest version (v6) is Nolvus Awakening.
The language you select has to be the same than the one you selected in steam.
Only the base game will be translated, not the mods.
If you get error 402 for certain mods not hosted on nexus, please do the following
Note : Your credential will be stored on your local machine and nowhere else.
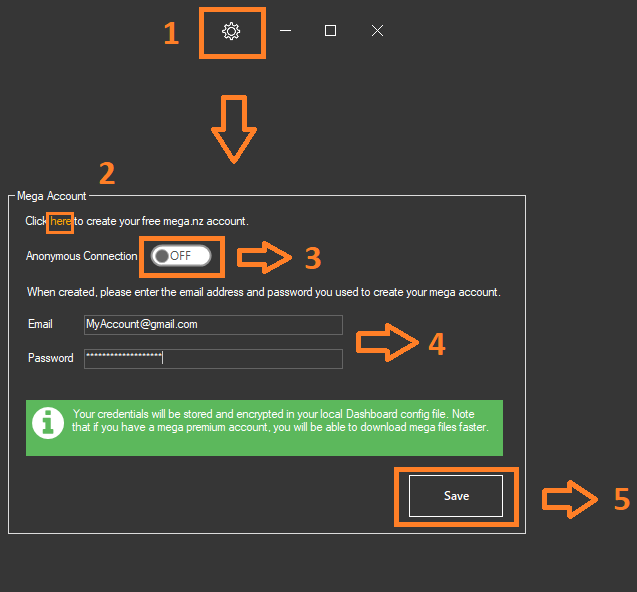
When done click on Continue
Select the directory where you want to install your instance as well as archive directory.
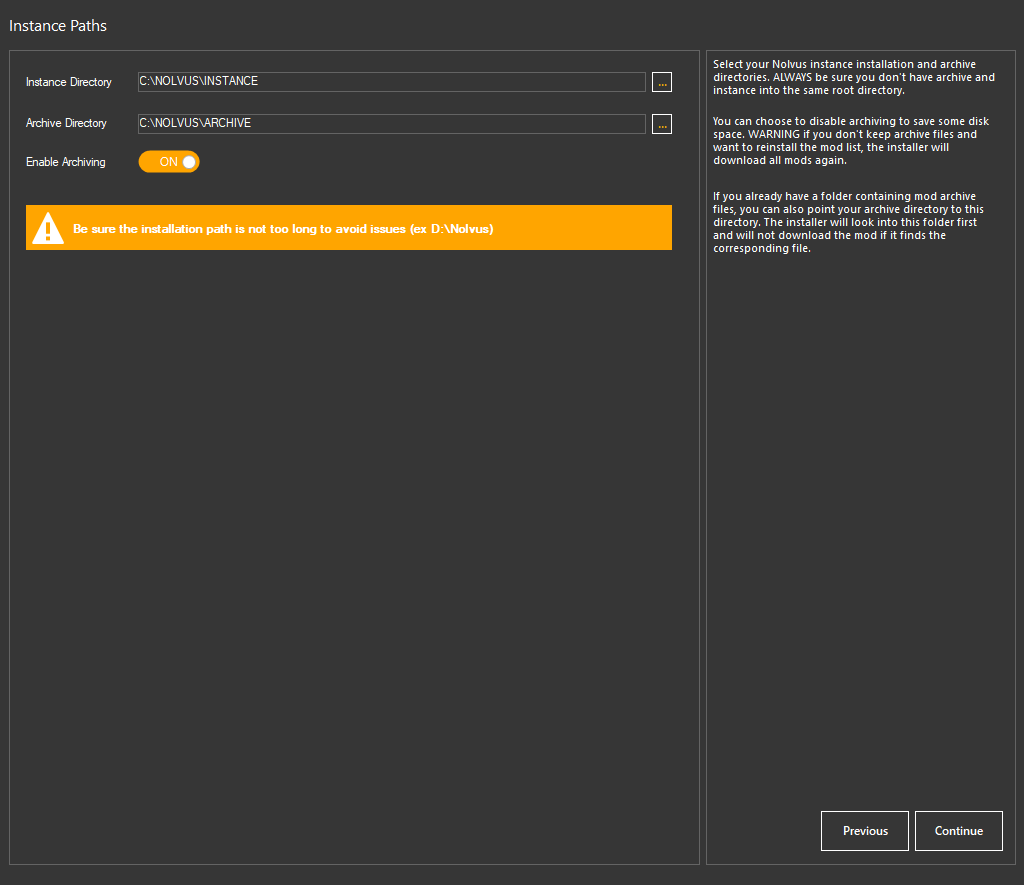
Instance directory will contain Mod Organizer 2, profile info and installed mods
Archive directory will contain the mods archive files
If you don't want to archive the mods just disable the option.

DON'T INSTALL THE LIST ON A HDD!!!
You can tho set the archive directory on a HDD to spare space on your SSD.
You can point your archive directory to a folder that already contains mod archives, if the files match (checksum), the installer will not redownload them.
When done click on Continue
The following steps will differ depending the Nolvus version to install you choose.
Select your performance options
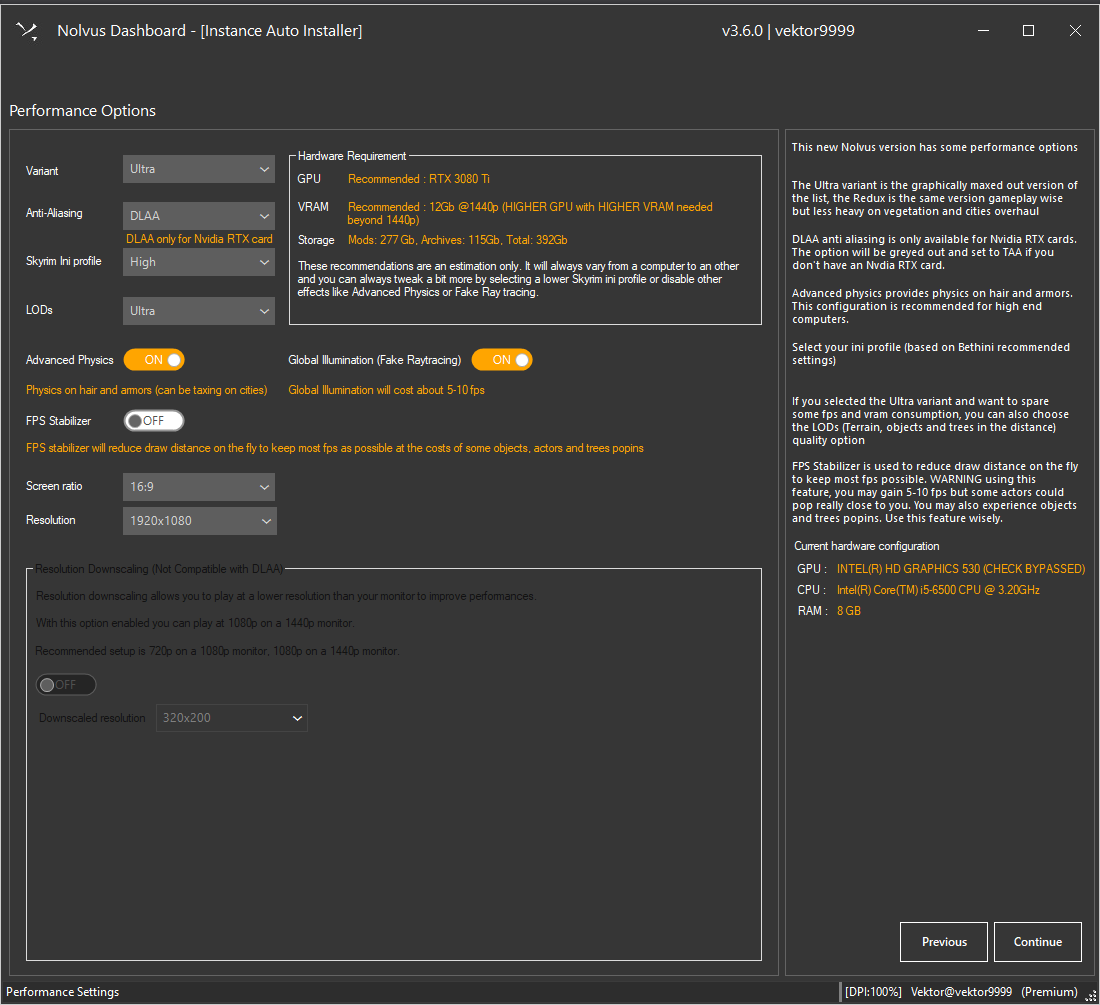
There are 2 variants you can choose from, Ultra or Redux
Ultra is the maxed out preset of this list
Redux is less heavy on cities and vegetation while keeping the same gameplay mechanics
All hardware requirements and storage space are listed depending your selections.
Select your antialiasing
You can choose TAA (performance friendly Anti aliasing) or DLAA which is the new NVIDIA anti aliasing system (cost more on perfomance)
Warning choose DLAA only if you have an NVIDIA RTX card otherwise you will CRASH AT START.
Choosing DLAA will install new mods to make it work and you will not be able to change that after installation.
You can also select your default Skyrim ini profile (based on Bethini with recommended settings)
It's not recommended to use Bethini with Nolvus because in some cases it can cause issue with the installer options
Ini profile can be changed after installation
If using Ultra variant, you can also select the LOD's (vegetation, objects in the distance) quality.
LOD's cannot be changed after installation.
Select SMP physics and Fake raytracing options (cost on performance).
These 2 options cannot be changed after installation.
Select FPS Stabilizer, if you want to save some fps by reducing the draw distance on the fly at the costs of some actors, object and trees popins.
This option cannot be changed after installation.
Finally you can use the downscale feature fo the installer, if you want for instance to play at 1080p on a 1440p monitor to save performance.
Downscaling feature is not compatible with DLAA.
Be sure to select the right resolution for your monitor to not play zoomed or in a small window (the resolution can be changed after installation)
Select your monitor ratio (16:9/21:9)
Warning!!! Some mods will be added or not depending the ratio you selected so be sure to select the right ratio because you will not be able to change it after installation.
When done click on Continue
Select your additional options
These options can not be changed after installation.
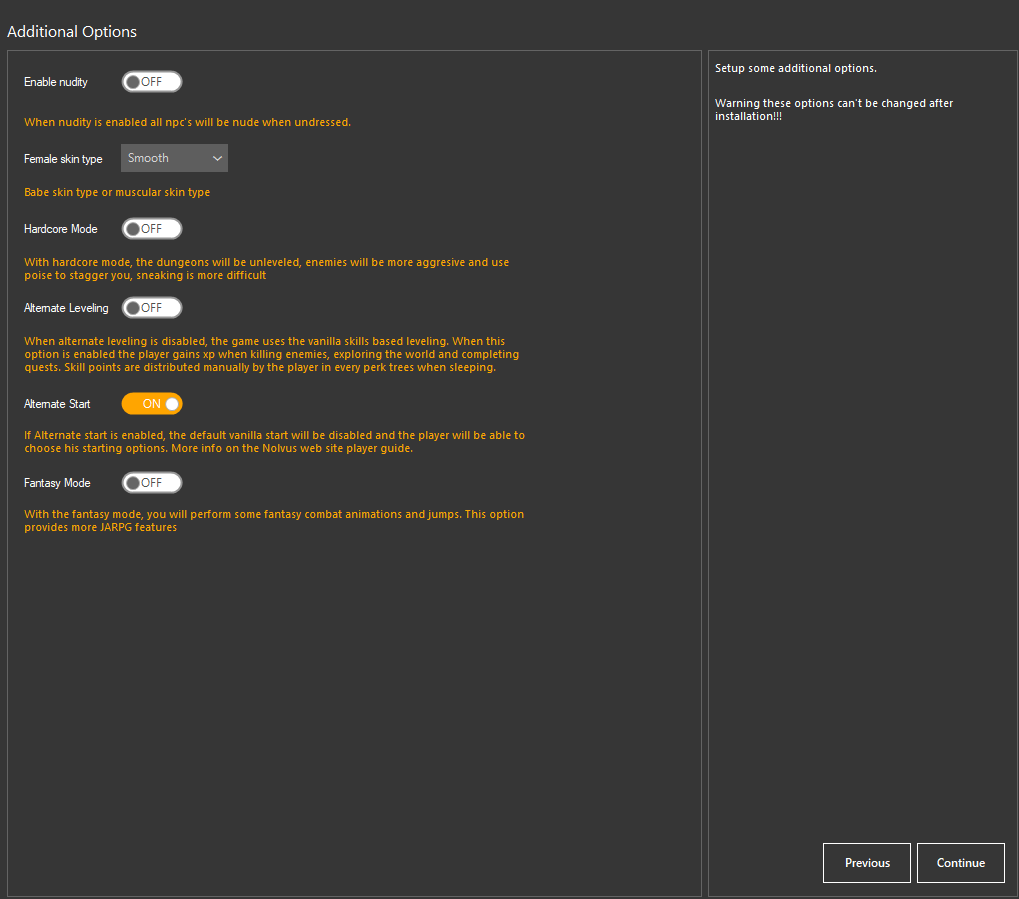
You will find more info about the different options here
When done click on Continue
Select your ENB
Available ENB presets are
Click here for the Cabbage ENB installation tutorial
Install Cabbage ENB AFTER the Nolvus mod list has been installed!!!
The ENB preset can not be changed after installtion (except if you install it manually)
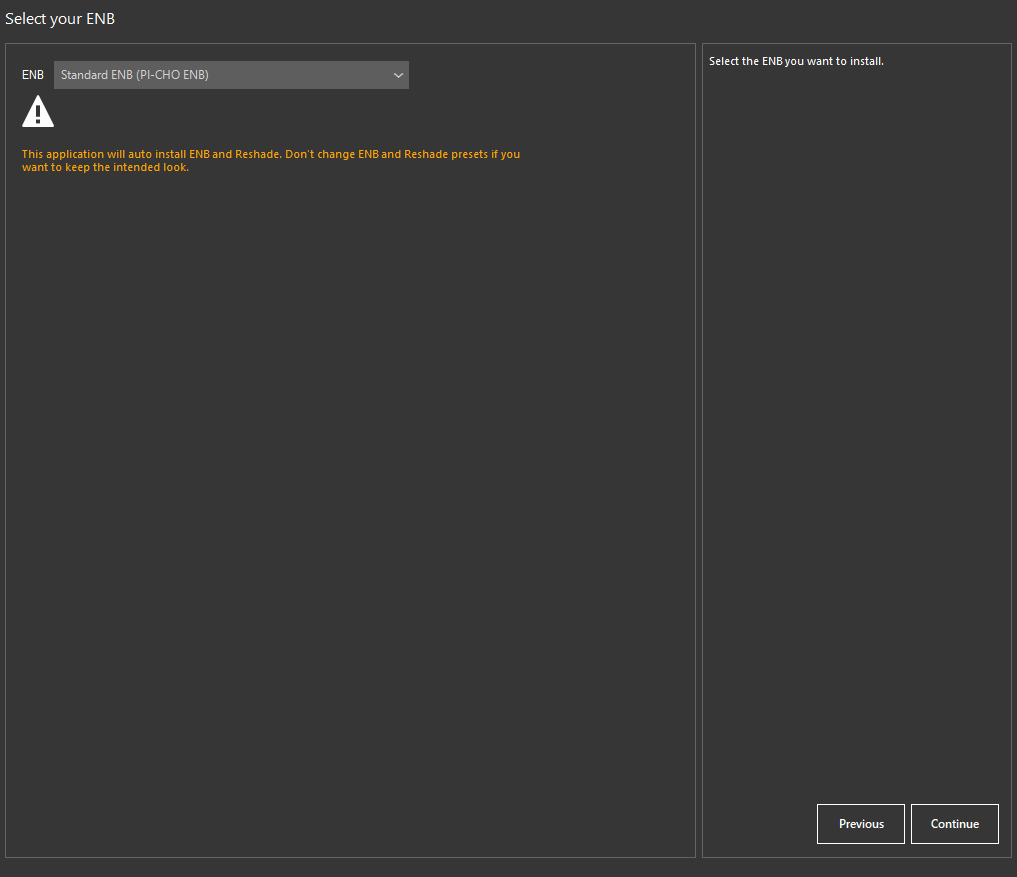
When done click on Continue
Set your page file size
THIS IS REALLY IMPORTANT TO AVOID CRASHES (specially if you only have 16 gb of ram)
More info here

When done click on Continue
Select your best download location (only for Nexus Premium users) and click on Continue.
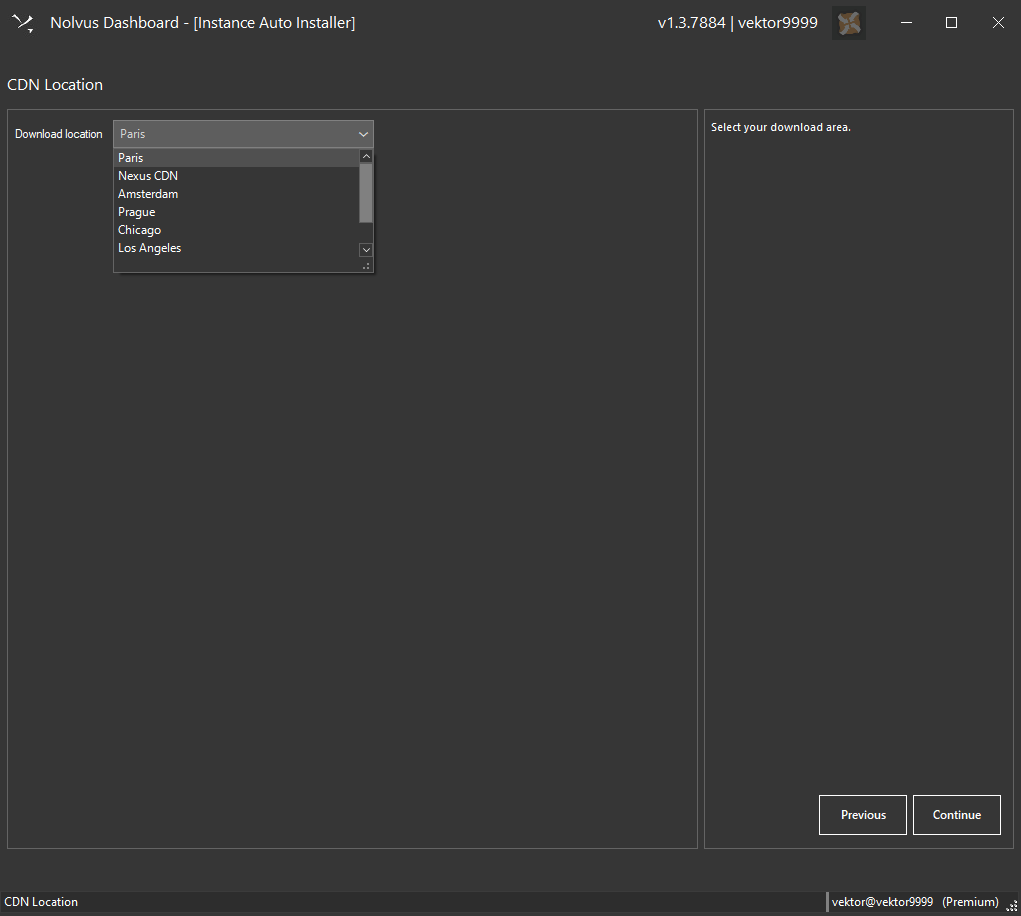
If your download are slow or buggy, select an other location (near where you live).
Review your installation settings and click on Start

Select your performance options
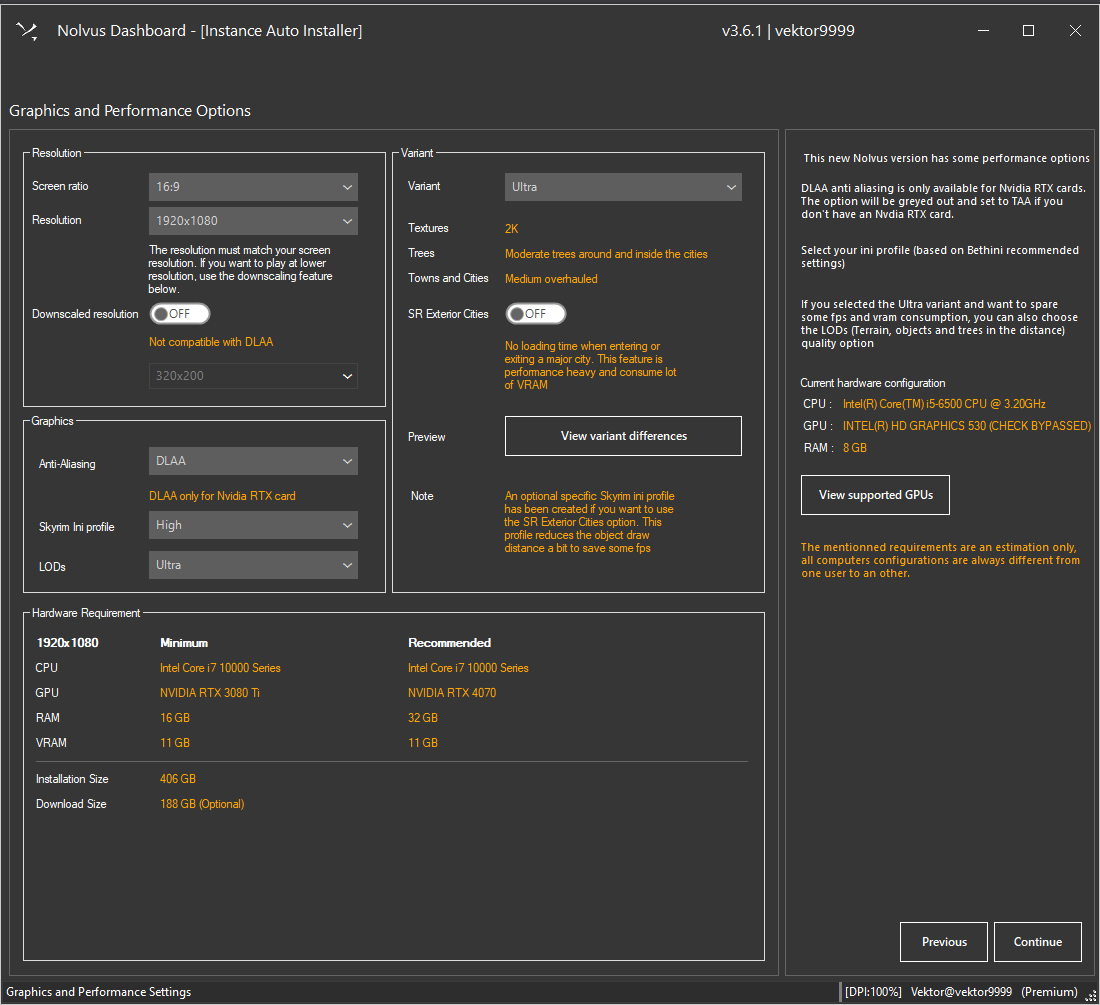
There are 3 variants you can choose from, Ultimate, Ultra or Redux
Ultimate 4K-2K Textures with heavily overhauled towns and cities, more trees and clutters
Ultra 2K Textures with medium overhauled towns and cities, less trees and clutters than the Ultimate
Redux 2K-1K Textures with slightly overhauled towns and cities, no tree around and in the cities
All 3 variants share the same gameplay mechanics
Choose wether you want to use the SR Exterior Cities option or not
SR Exterior Cities is a mod that prevents loading screen when enterring a major City.
This mod is performance heavy and consume lot of VRAM when used in a massive graphic list (this is why it's optional)
All hardware requirements and storage space are listed depending your selections.
Select your antialiasing
You can choose TAA (performance friendly Anti aliasing) or DLAA which is the new NVIDIA anti aliasing system (cost more on perfomance)
Warning choose DLAA only if you have an NVIDIA RTX card otherwise you will CRASH AT START.
Choosing DLAA will install new mods to make it work and you will not be able to change that after installation.
You can also select your default Skyrim ini profile (based on Bethini with recommended settings)
It's not recommended to use Bethini with Nolvus because in some cases it can cause issue with the installer options
Ini profile can be changed after installation
If using Ultra variant, you can also select the LOD's (vegetation, objects in the distance) quality.
LOD's cannot be changed after installation.
Finally you can use the downscale feature fo the installer, if you want for instance to play at 1080p on a 1440p monitor to save performance.
Downscaling feature is not compatible with DLAA.
Be sure to select the right resolution for your monitor to not play zoomed or in a small window (the resolution can be changed after installation)
Select your monitor ratio (16:9/21:9)
Warning!!! Some mods will be added or not depending the ratio you selected so be sure to select the right ratio because you will not be able to change it after installation.
When done click on Continue
Select your additional options
These options can not be changed after installation.

You will find more info about the different options here
When done click on Continue
Select your difficulty preset
These options can not be changed after installation.
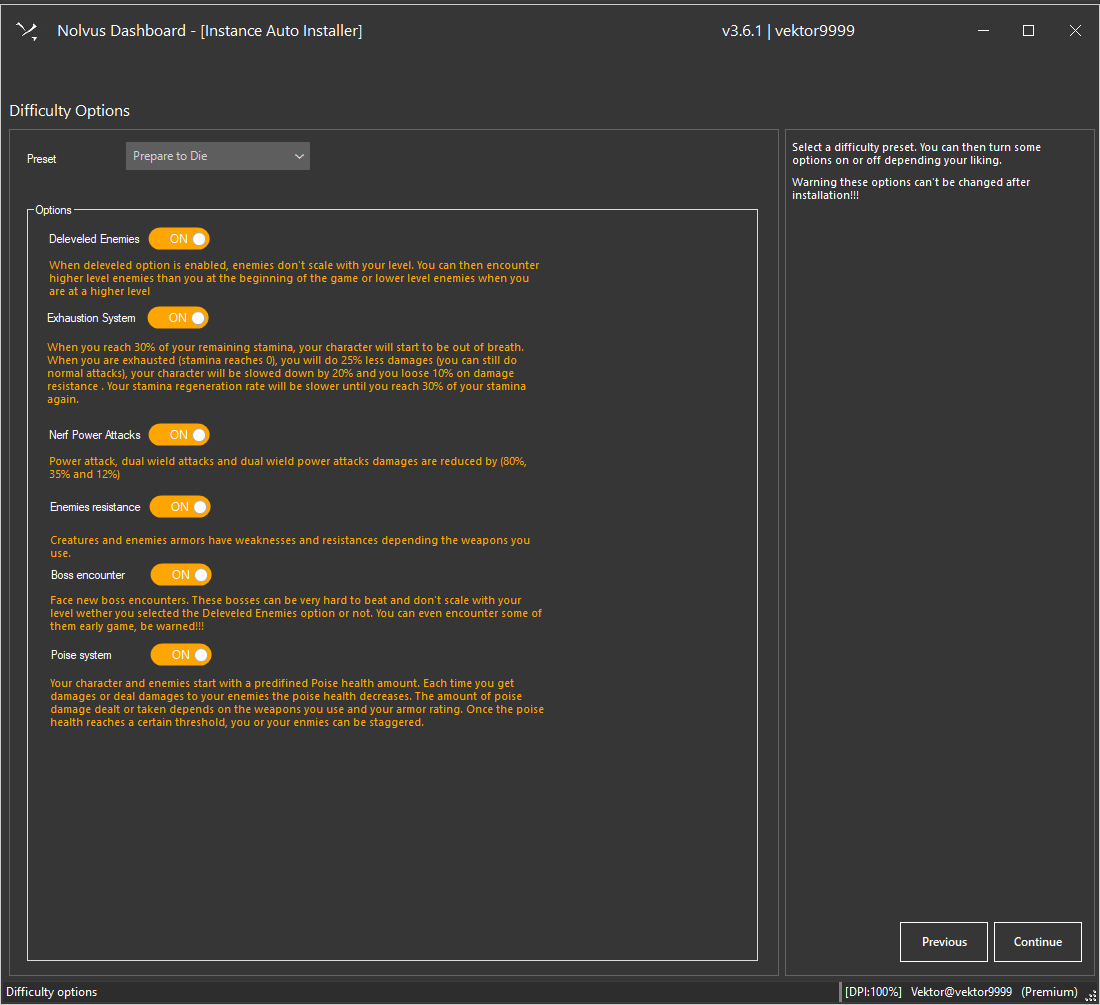
Select one of the available presets. You can then disable or enable a feature independently.
When done click on Continue
Select your ENB
Available ENB presets are
The ENB preset can not be changed after installtion (except if you install it manually)
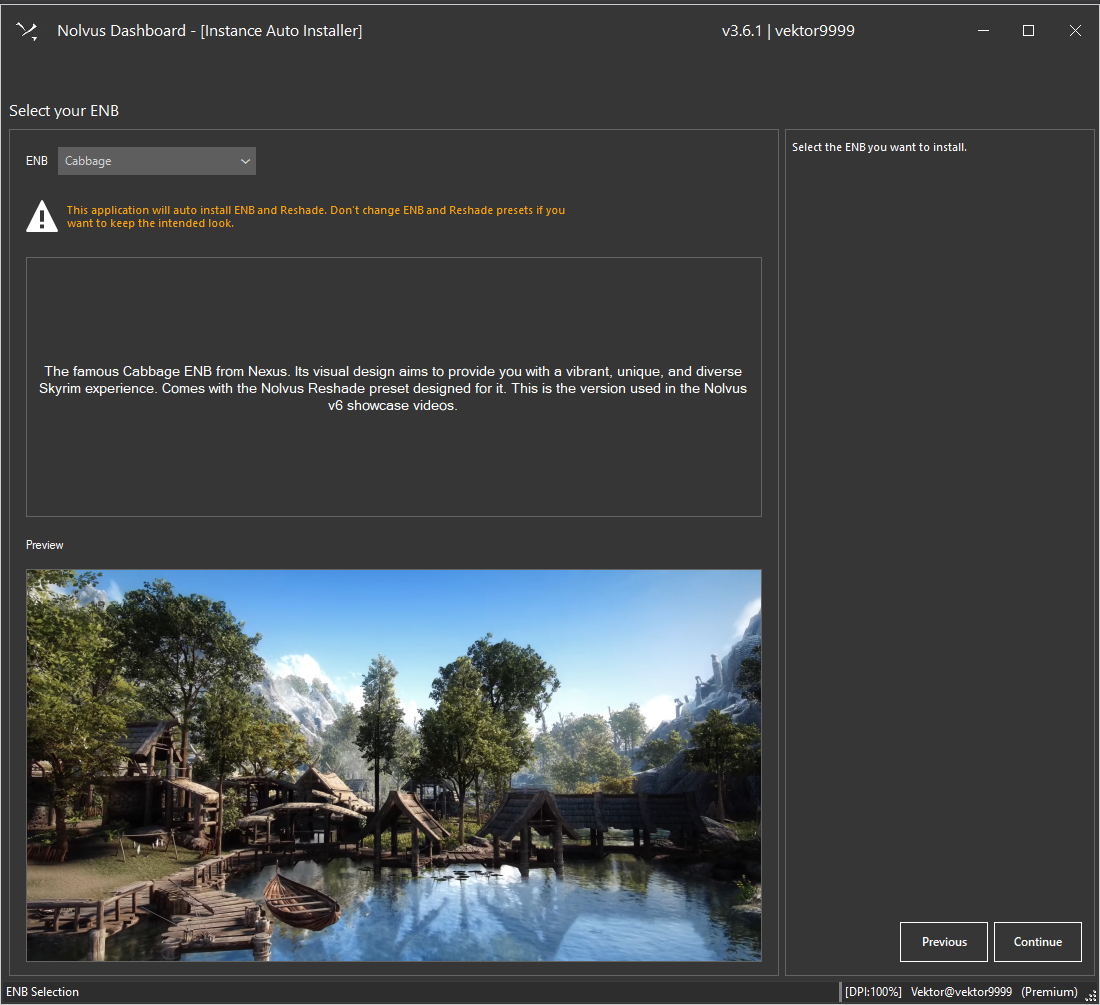
When done click on Continue
Set your page file size
THIS IS REALLY IMPORTANT TO AVOID CRASHES (specially if you only have 16 gb of ram)
More info here

When done click on Continue
Select your best download location (only for Nexus Premium users) and click on Continue.

If your download are slow or buggy, select an other location (near where you live).
Review your installation settings and click on Start
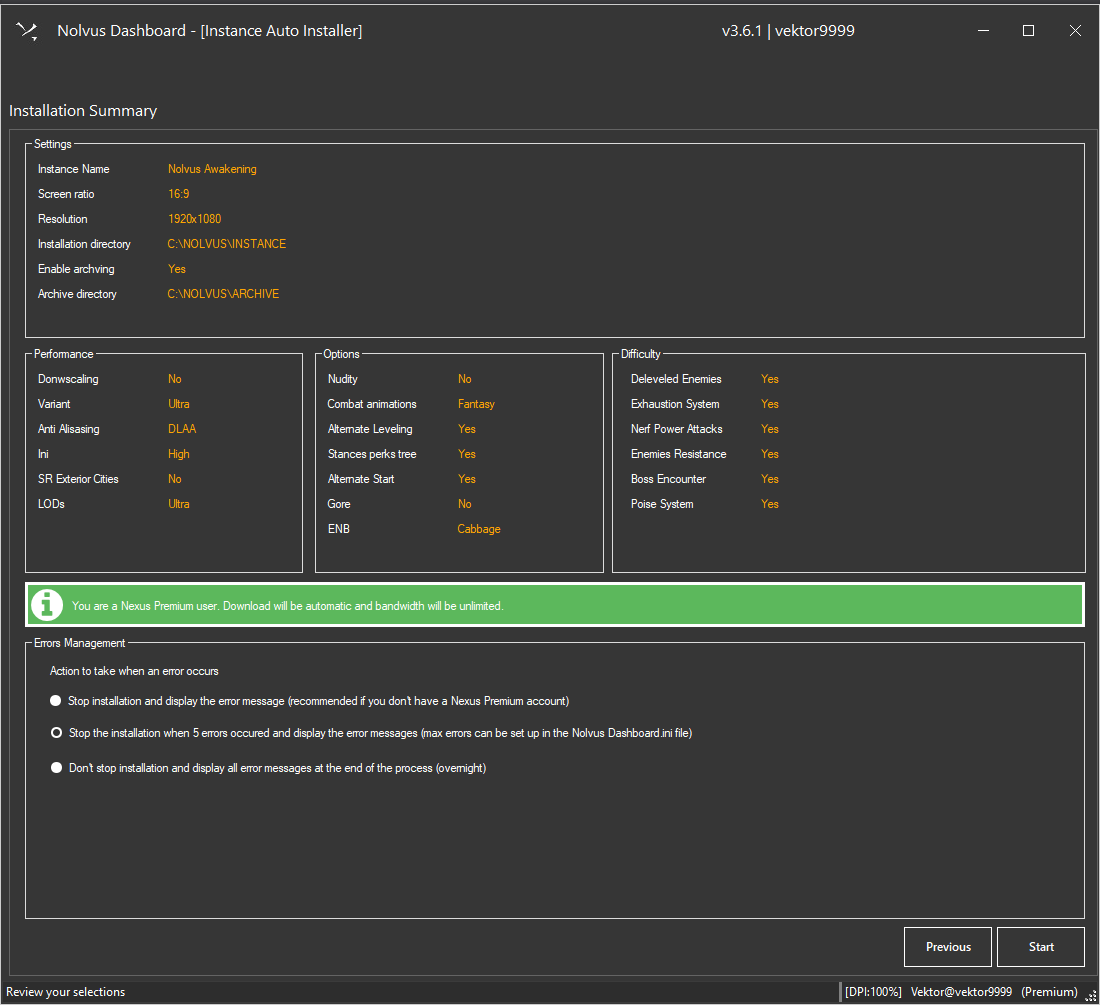
Let the installer proceed its job.

If you get issues during installation, please check our faq first. The majority of issues you could get is covered. You can also join our Nolvus discord. Before asking, be sure it has not already been answered by doing a quick discord search to save people time.
These are the post steps to follow to be sure everything is ok and to prevent any bugs or black screen issue when you launch the game.
1. When the dashboard has installed your Nolvus Instance, click on Manage and Instance

Be sure you don't have anything in red

2. Go back to the instances screen and click on Play. The installer will launch Mod Organizer 2.
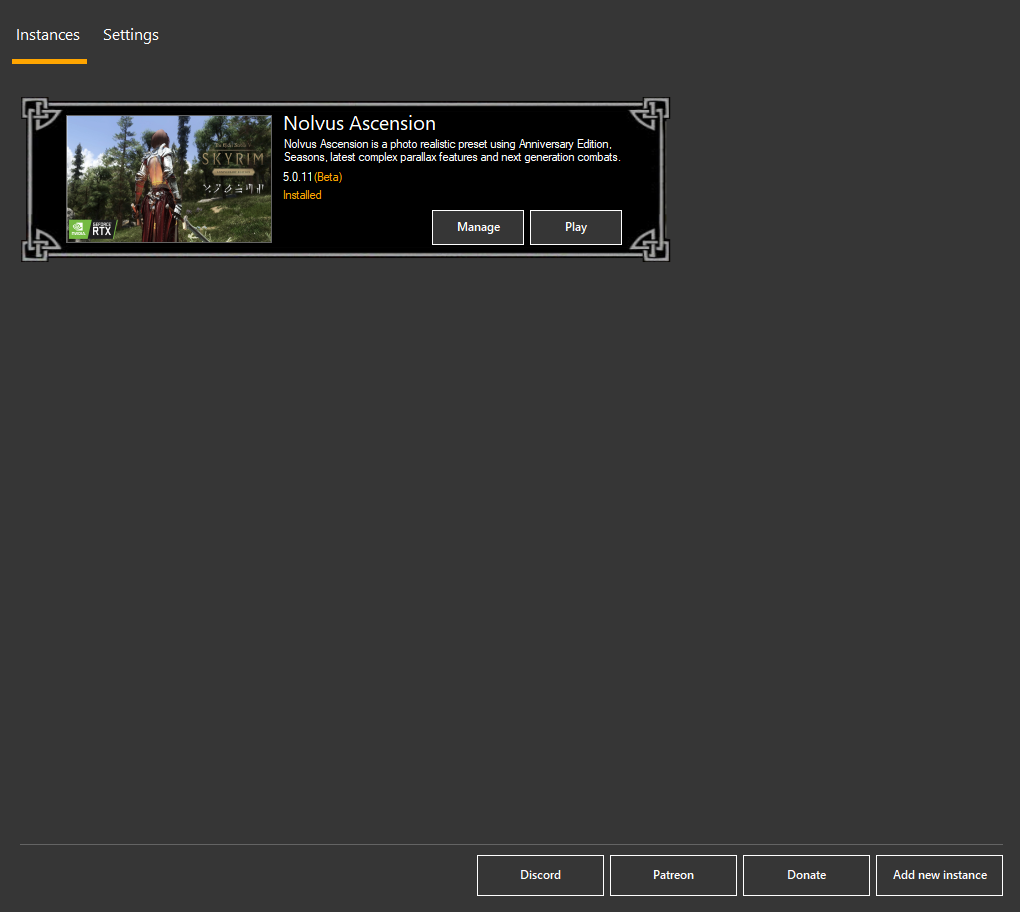
3. Select NOLVUS in the right drop down list and click on RUN to launch the game.
WARNING!!!
Before running the game please read FIRST our Quick Player Guide and Known issues
When the Nolvus mod list is installed, you don't really need the dashboard application anymore unless you want to check for Nolvus mod list updates, change some settings or re apply the default load order.
You can create a shortcut to run the Nolvus Mod Organizer 2 directly.
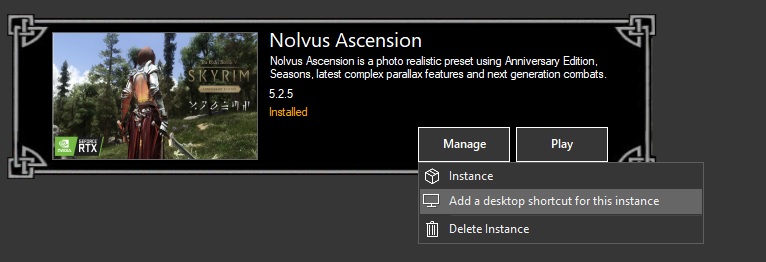
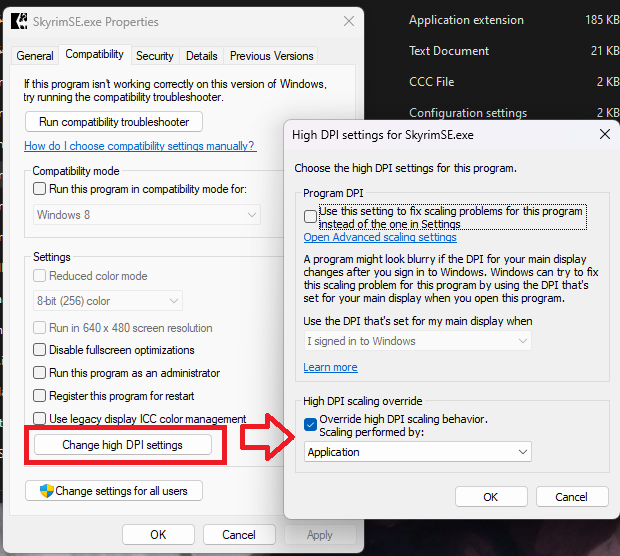
If you use Windows Custom scaling (right click on your desktop => Display Properties => Scaling percentage) higher than 100% your game will be zoomed in
In this case you have 2 possibilities
Go to your SSD:\NOLVUS\Instances\Nolvus Ascension\STOCK GAME directory. Right click on SkyrimSE.exe and set as follow.
Click on Manage and Delete

After your instance has been deleted, you will be able to install again
Note : the installer will not delete your archives but just the instance. So if you kept your archives and don't change the archive path when reinstalling, the installer will not download the mods again.
To review your instance settings click Manage and Instance
Click on settings

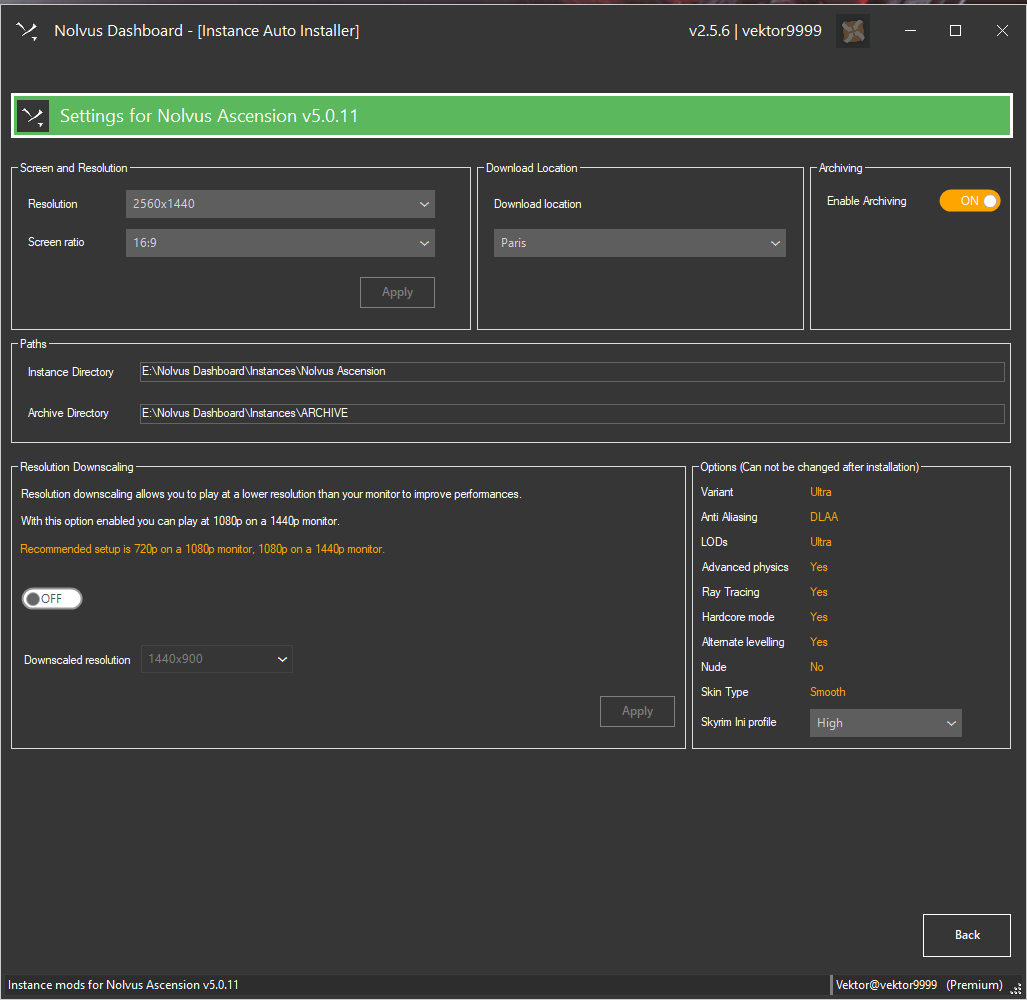
Installation time will depend on many things
On modern computers, if you are Nexus premium and have a good internet speed, it should take about 1hour to install everything (15 minutes with archives).
When the mod list is installed, all instances info are stored into the file InstancesData.xml under INSTALLDIR\Instances directory
For more technical info, click here
Do not DELETE or MODIFY this file if you don't want to BREAK your INSTALLATION!!!